In a survey, around 73% of professionals admitted to creating video content regularly.
Whether you are an educator, influencer, or business, chances are that video creation and marketing have become part of your operations.
And rightly so, as more and more people are watching video content by the day. Not to mention sharing videos with their friends, colleagues, and family members. This is because video content is easier to consume and digest than plain text.
But what if there’s a way to make videos even easier to understand and more engaging? You wouldn’t want to miss out on this opportunity.
That way is to add subtitles to your video. In this tutorial, we’ll walk you through the easiest way to add video subtitles and provide a great experience to your viewers.
If you prefer to watch this guide in video format, we’ve got you covered below.
Table of contents:
Automate subtitles fast and easy with Piktochart Video. Creating an account is free.
Why add subtitles to videos?
Subtitles play a significant role in the success of your video content.
For example, 85% of Facebook video is watched without sound, along with two-thirds of Snapchat videos. And we’re sure the data from other social media channels will corroborate the same.
Subtitles also cater to the deaf or hearing-impaired, increase comprehension of your video presentation in multiple languages, and break cultural barriers, letting your videos reach a wider audience.
Besides that, video subtitles also help with SEO. They make it easy for search engines like Google to crawl and understand the contents of your video, leading to a high ranking in search engine result pages (SERPs).
Now that you know the benefits of adding subtitles to your video let’s take a quick detour to clear a common confusion.
Subtitles or captions?
Many people think of subtitles and captions as the same thing and use both terms interchangeably. But there is a slight difference between them. Nevertheless, it’s essential to understand that difference before you start adding subtitles to your video.
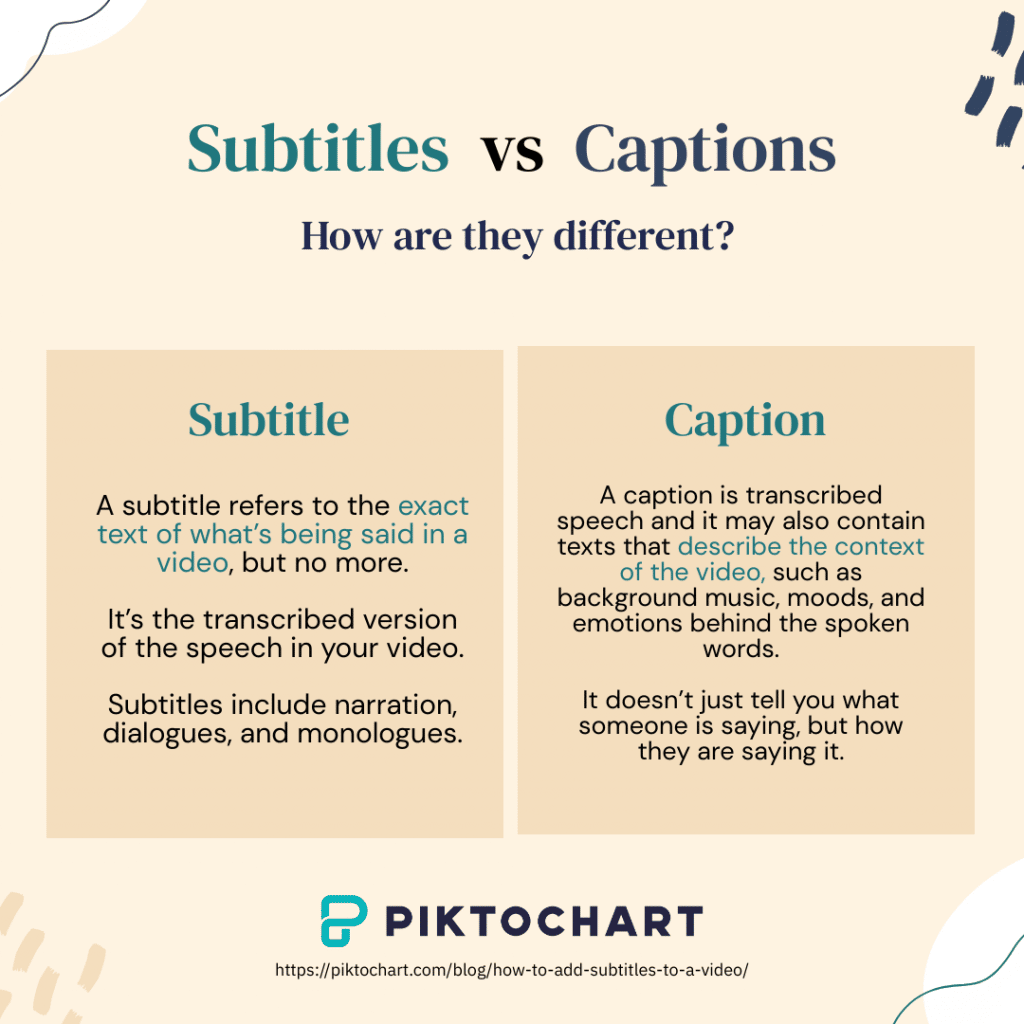
- A subtitle refers to the exact text of what’s being said in a video, but no more. It’s the transcribed version of the speech in your video. Subtitles include narration, dialogues, and monologues.
- A caption also means transcribed speech, but it may also contain texts that describe the context of the video, such as background music, moods, and emotions behind the spoken words. In other words, it doesn’t just tell you what someone is saying, but how they are saying it.
Captions are mainly employed for people who are hard of hearing or deaf. This way, they can understand the dialogue and the subtle details of events happening in the video. For example, a caption can convey loud thunder, a mystery of murder, or noises in a crowded bar.
Captions are further classified into two categories: Open and Closed. Closed captions are those that a viewer can enable or disable as per their preference, while open captions are integrated into the video file itself. So they always remain on display and cannot be turned off.
How to automatically add subtitles to video
As we discussed, adding subtitles to videos is a crucial step to improve video views and engagement. And that’s where Piktochart Video’s video editing software fills the gap.
Piktochart Video is a simple video maker designed to help thought leaders, coaches, consultants, and marketers make polished video clips in minutes. It also comes with a subtitle generator powered by machine learning.
Add subtitles to your video in an instant
Piktochart Video is the easiest way to add (and edit!) subtitles to your video. We also support over 60 languages.
Try Piktochart Video for free
So here’s our step-by-step tutorial on using Piktochart Video to add subtitles to your video.
Step 1. Record or upload a video
If you don’t have a Piktochart Video account, registration is free. Just complete the signup process, or log in to land on your Piktochart Video Dashboard.
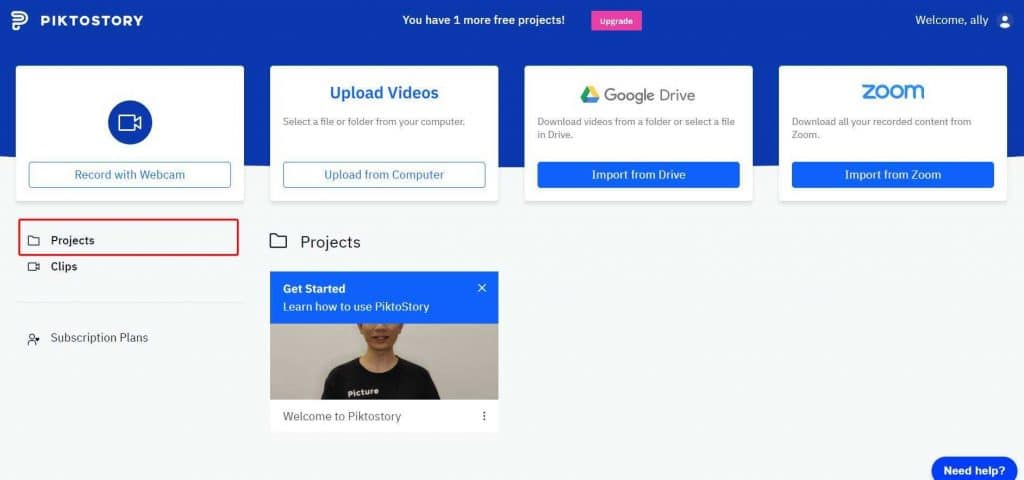
The first step is to import your video. There are four options you can choose from to upload a video file from your computer.

- Record yourself via webcam
- Select a file from your computer
- Import video from your Google Drive
- Import video from a Zoom recording
For example, to import your video file from your computer, simply click Upload from Computer. Then locate and select the video file from your computer and click Open.
You can also check out our complete guide on importing videos to learn more about other ways to upload your video.
Step 2. Select what language the video is in
One of the most significant benefits of Piktochart Video is that it supports transcription in multiple languages. So once you upload your video, you’ll see a popup requesting you to select the language of your video.
Here, you can start typing in your desired language to perform a search or use the dropdown menu to locate the same.
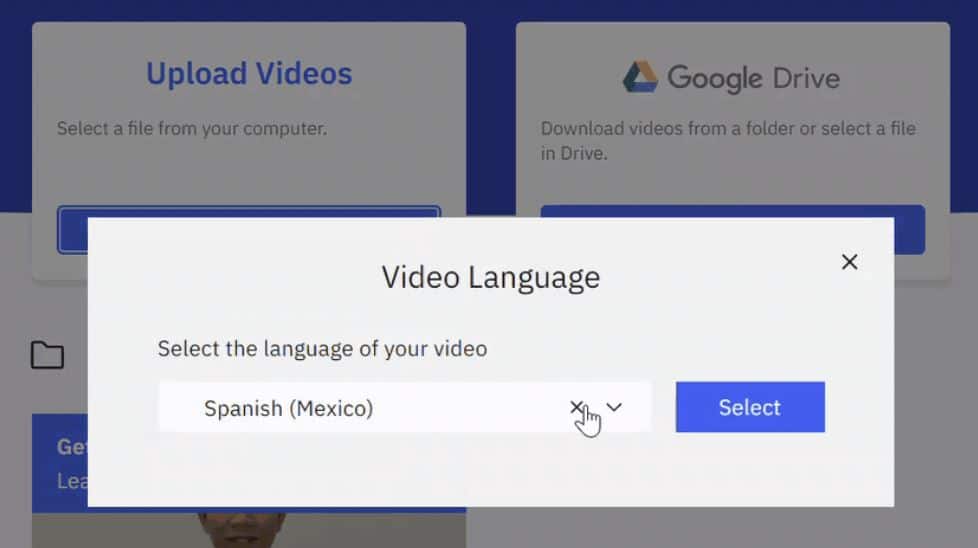
Once you have confirmed your language, click Select. Your video will automatically start rendering.
Step 3. Edit any transcription errors that might have occurred
When the rendering is done, go to the Projects panel in your dashboard to locate the video project. Then click on the video project to further edit your footage.
Once you’re on the video editor screen, you will see that the subtitles of your video have been automatically generated using machine intelligence. The video editing screen is divided into two parts.
Basically, you can edit subtitles on the left panel and modify their appearance on the right panel. Let’s first talk about the left portion.
If some parts of your subtitles are not accurate, Piktochart Video lets you edit them easily. To edit your subtitles, click on the text panel on the left and edit the text, similar to how you edit a text document.
For example, to remove or modify any part of the text or video, just select the part from the left side of the editing screen. Then type in the text you want to replace it with, or press Remove to cut the part.
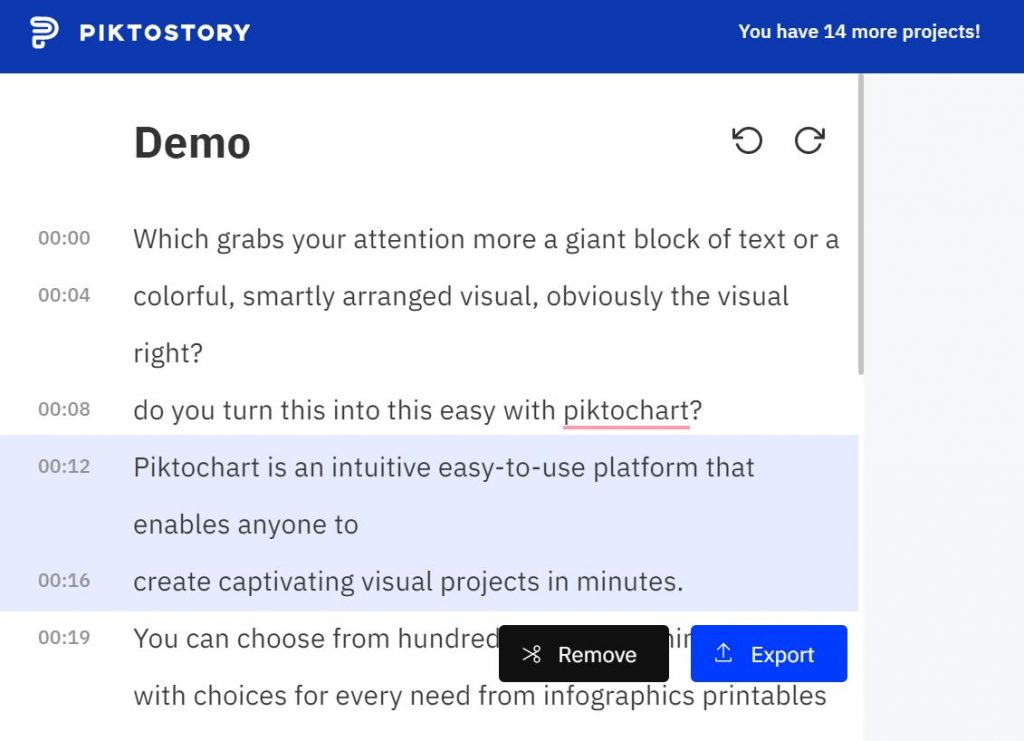
As you edit subtitles in the left panel, you will see your video subtitles getting updated in real-time on the video preview on the right.

Not just that, Piktochart Video gives you several formatting options on the right, just above the video preview. You can use these settings to adjust the font, alignment, color, and other factors related to your subtitles.
Plus, you can also drag and drop your subtitles to change their placement in the video area. This way, your subtitles will look and feel exactly how you want them to when the video is played.
Step 4. Export your video
Happy with your subtitles? The final step is to either export your whole video as a project or turn it into short, bite-sized clips.
- To export the complete video, click Export in the top right corner and give a name to your project.
- If you’re rather export a short clip from your video, select the desired portion of your transcript. Then click Export in the top right corner.
That’s it. Once exported, you can find the exported clip under the Clips panel on your dashboard.
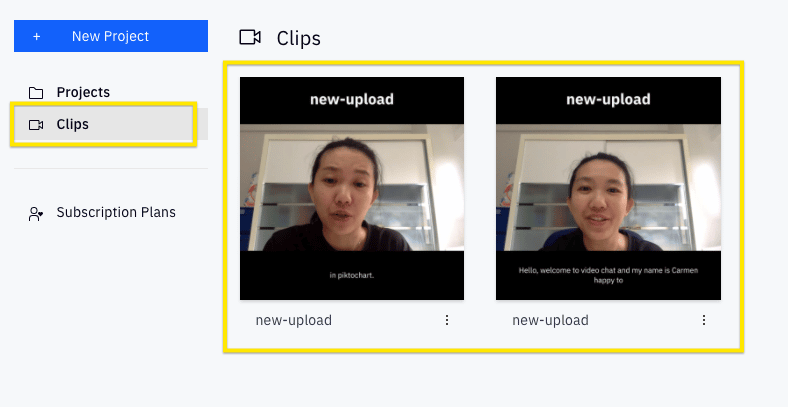
From there, you can download the clip or share it on social media.
- To initiate a download, simply place your mouse over the clip that you want and click Download. From there, you can save it on your computer.
- To share the clip on social media, click the 3-dotted lines at the bottom of the clip. Then select Share and choose your preferred social media channel.
Alternatively, you can also select Copy Sharing Link to copy the URL of the clip to manually share on any platform or website.
Wrapping up
As people increasingly watch videos in their daily lives, you’re competing with many videos for eyeballs. And you need every big and small advantage you can get over the competition. So adding subtitles to your videos has become essential.
Piktochart Video makes this step so easy that there’s no reason to avoid it. By incorporating subtitles into each and every video you release to the world, you can enhance accessibility and improve the performance of your video content.
So it’s time to get started. Automate subtitles and boost your video’s marketing potential with Piktochart Video today. Creating an account is free.
