What would you do if you wanted to teach something to a group of students, coworkers, or people in your target market, especially in today’s increasingly remote work environments?
You can conduct a live webinar, but not everyone will attend. Or you can put the instructions into words, but they may not be easy enough to follow in the written format.
A better way is to show the process with a recorded video, also known as an instructional video or learning video.
Instructional videos are even easier to make when they involve recording your screen with audio and video.
How to record your screen with audio and video for training
That’s where this post comes in: here’s all you need to know about how to make an instructional video with screen recording, step by step.
Whether you’re teaching students, promoting your info-product business, or launching an online course, an instructional video is the best method for delivering your content.
Looking for an easy-to-use screen recorder with a built-in video editor? Try Piktochart for free.
Table of contents
What is an instructional video?
An instructional video is a video that demonstrates a process or explains a concept.
The main goal of such a video is to transfer knowledge and teach viewers how to do something. Our tutorial on how to manage your workspace is an excellent example of an instructional video.
An instructional video has some key advantages over plain text. It allows you to highlight features and details in the same environment that the viewers will jump in themselves. And it gives them the confidence to try out the steps you’re teaching.
Types of instructional videos
Instructional videos can be divided into four main types:
1. Tutorial video
A tutorial video covers a short and specific process with step-by-step instructions, like the example below.
2. Training video
A training video is similar to a tutorial video, except that it tends to be longer and is often used in workplace settings to improve employees’ professional skills. They are also perfect for those who are planning to upskill. Here’s a good example.
3. Presentation video
As the name implies, this video involves recording a lecture or presentation for the audience to consume after the fact. The following video illustrates this well.
4. Screencast video
Screencasts are quick screen recordings made to show someone how to do something on the computer, or to show presentation slides on the screen when sharing knowledge. Take a look at the example below.
Regardless of the differences, there are many commonalities in how you create these videos. Let’s understand this in more detail below.
Planning your instructional video
Failing to plan is planning to fail. Follow the best practices below to plan your instructional video.
1. Know your audience
Your instructional video can’t help the audience if you don’t know who they are. Identifying their problems, needs, and interests will help you make an effective learning video.
For example, start by determining demographic details such as their level of education, age, and profession, along with what concerns they may have about the subject you’re going to cover. Then, use this data to determine the video topic as well as subtopics.
2. Pick a specific topic and learning objective
What exactly do you want your audience to know by the end of the instructional video, and how will it help them?
When planning an instructional video, it’s crucial to have a concrete end goal in mind. It will help you stay focused and pack the most value in your video.
Also, research shows that learner engagement begins to drop after six minutes of watching an instructional video, and it falls drastically after nine minutes. So pick only one quick topic. Otherwise, you risk packing too much information and overwhelming the viewers.
For example, instead of creating a single long video on how to hire the right people for your business, it’s better to create short, focused, and separate videos on evaluating resumes, interviewing candidates, and negotiating salaries.
3. Prepare a script or storyboard
Now it’s time to prepare an outline, script, or a combination of a script and storyboard, which is crucial in visual storytelling. The level of detail depends on you.
Some people are more comfortable with just a bullet list of points they want to cover, while others prefer planning each and every moment of the video carefully.
Here’s an example of what a simple script might look like. The audio column shares what the presenter will say while the visual column explains what the viewer will see in the video.
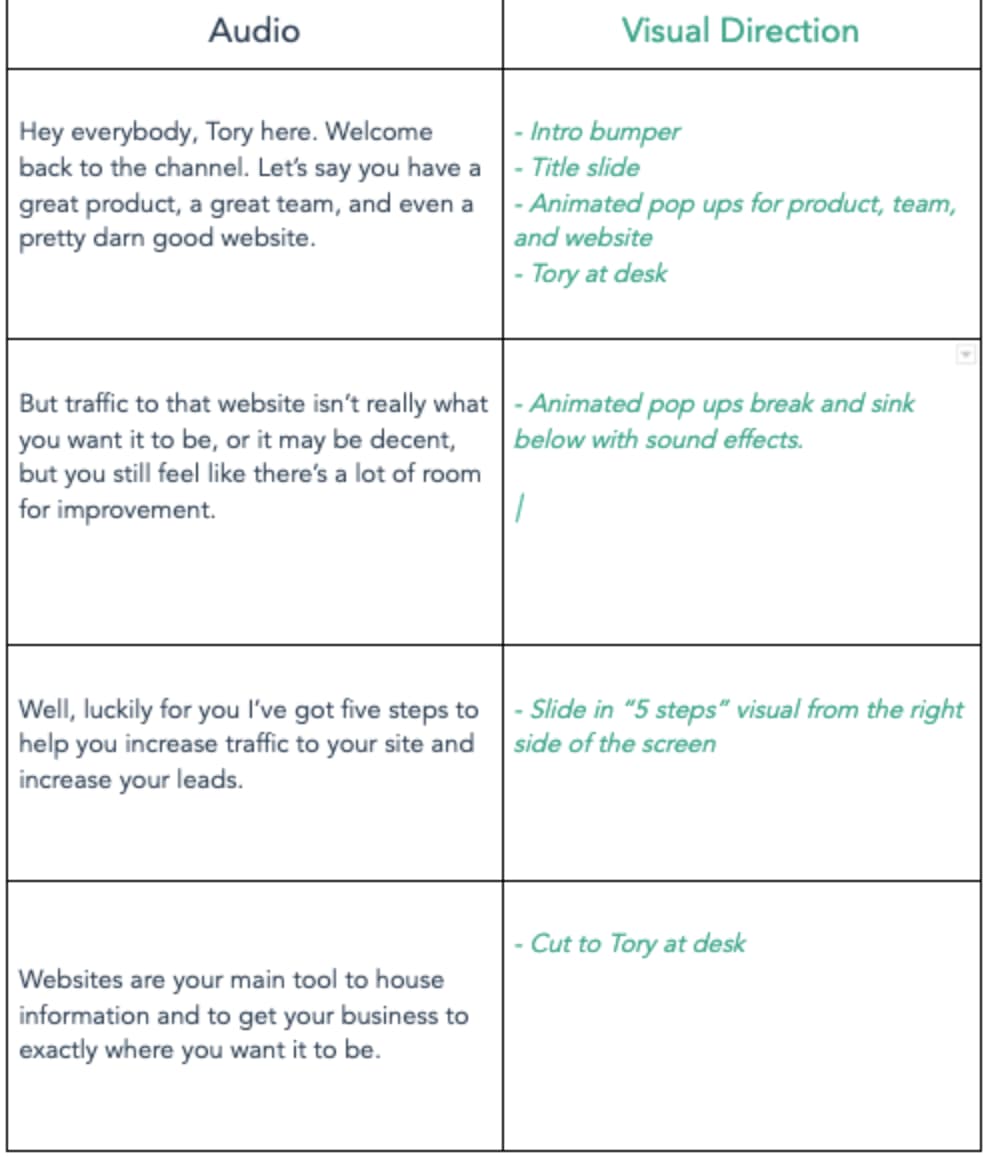
Even a simple script like this can help you prepare and save time when you start recording the video. It also helps ensure that you don’t forget anything important.
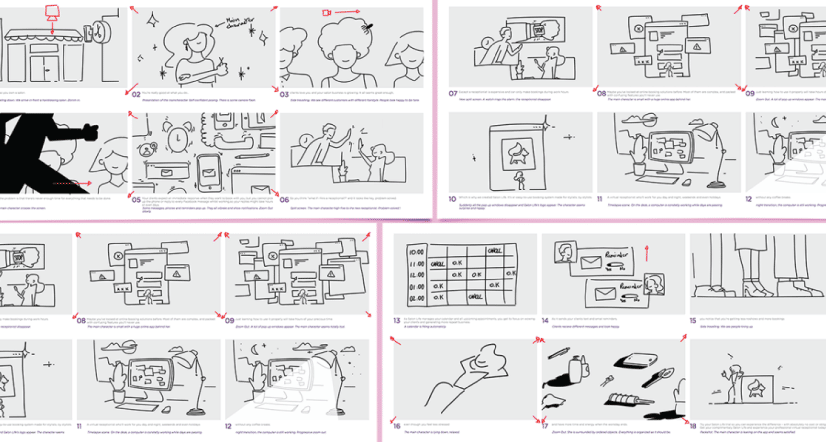
If you prefer more detail, you can combine your script with the storyboard concept. This means that instead of writing text in the visual column, you can have imagery depicting what the viewers will see.
The images can be drawings, screenshots, or stock photos depending on your skills and the nature of the video. Here’s an example of what that might look like.
What app can you use to record your screen in an instructional video?
You don’t need a fancy set of tools if you want to make an instructional video. All you need is a good screen capturing and video editing solution.
There are thousands of screen recorder apps on the market. Choose a platform that has all the essential features you might need.
These include the ability to edit and cut unnecessary parts, generate subtitles, and customize the appearance of the video to match your brand.
Not just that. It should be quick to learn and simple to use. That’s why we highly recommend Piktochart Video.
Whether you want to record yourself on a webcam, capture your screen, or combine both your webcam and screen, this versatile tool lets you create any type of instructional video.
It also comes with Piktochart Visual where you can create visuals of all kinds: infographics, presentations, social media posts, proposals, and more.
Does it cost a lot of money?
Budget is a critical factor when planning an instructional video with screen recording. The overall cost depends on many variables, but the most prominent is whether you outsource video creation or do it on your own.
Hiring a person or team
Here, you’ll need someone to write the script, record the process, give a great voiceover, and edit the recording. Other tasks such as transcribing the video or adding an intro will cost extra. Expect to pay anywhere between $100 to $500 per minute of the video.
Making your own video
If you decide to create instructional videos by yourself, all you need is a screen-recording tool like Piktochart Video. It will allow you to record and edit your video from the same platform.
With Piktochart Video, you can also create up to 20 minutes of video every month for free, and upgrade to a paid version for more. Try it for free.
How to create your instructional video in Piktochart Video
As you can see, creating instructional videos on your own is the cheaper option. Plus, you’ll be surprised by the quality of videos you can create with a little practice. Here’s how to get started.
1. Prepare to record your screen
Before you start recording, it’s important to get some groundwork in order. This includes the following:
- Find a quiet location to record. Too much noise can cause disturbance and interfere with your voice when you are recording.
- If you are recording with a camera, ensure your space has proper lighting. It’s best to sit in front of a window with lots of natural light.
- Close any unnecessary programs or tabs open on your computer screen. Also, turn off notifications that may pop up while recording.
- Do a quick mock test of the steps you’ll record before actually pressing record. The practice walkthrough will help you develop the right mindset and prevent mistakes.
2. Launch Piktochart Video and start recording
Log into your account or Sign Up to register as a new user.
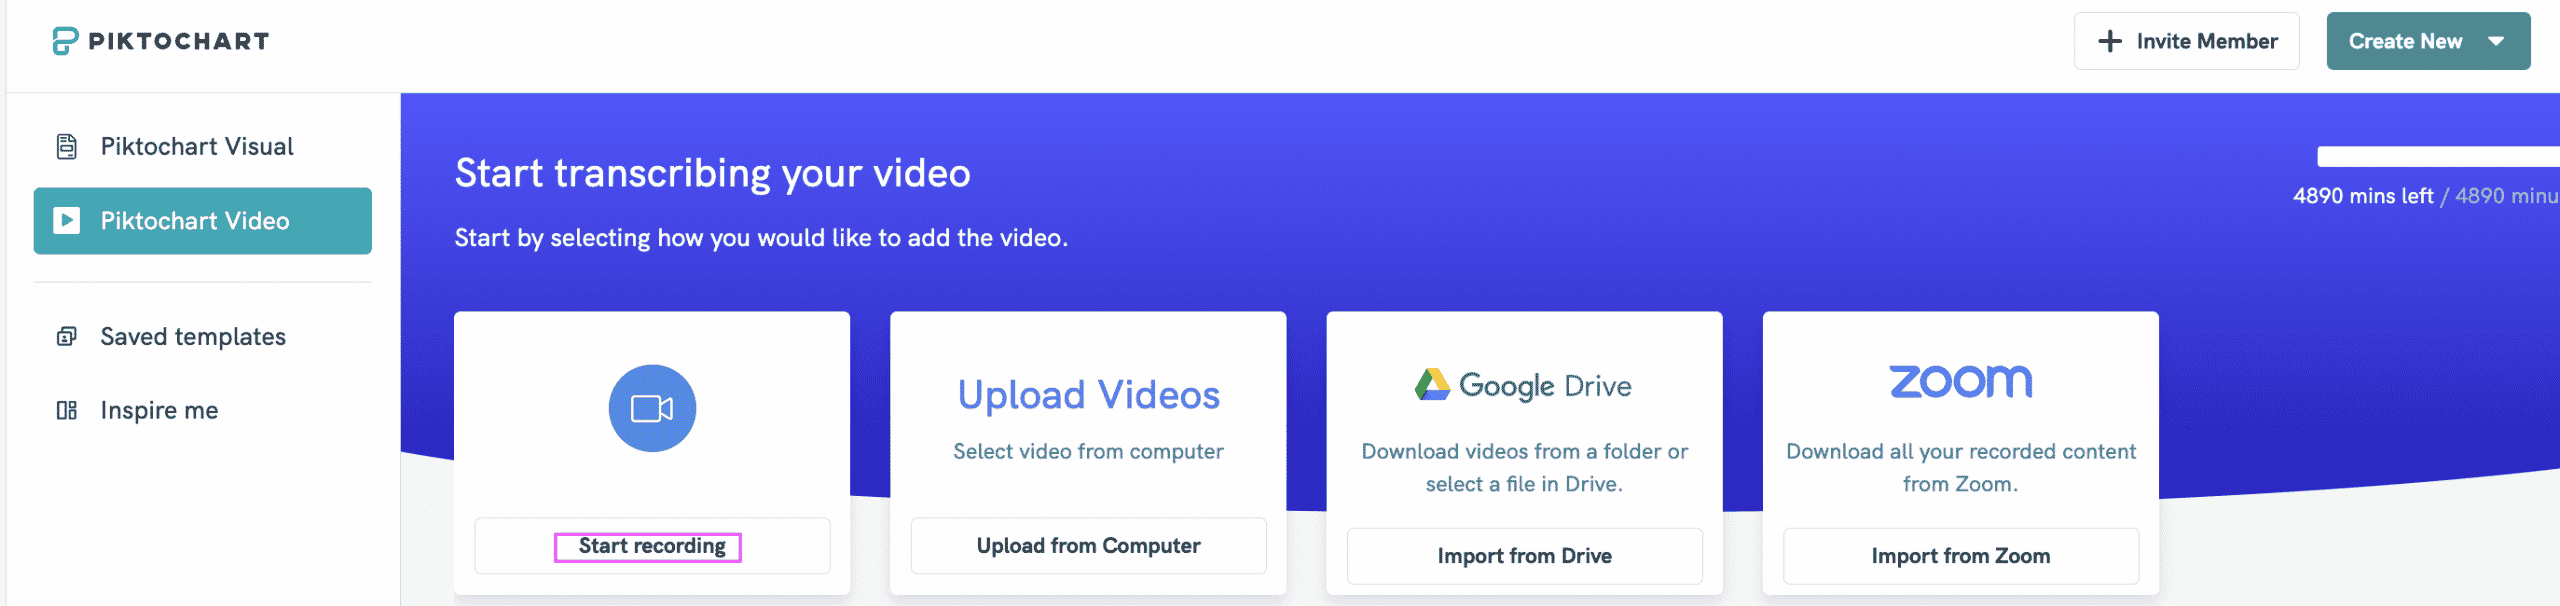
After you log in, click Start Recording from the options to import a video at the top of your screen.
Next, you’ll need to select what you intend to record. Your options are:
- Video
- Video + Screen
- Screen
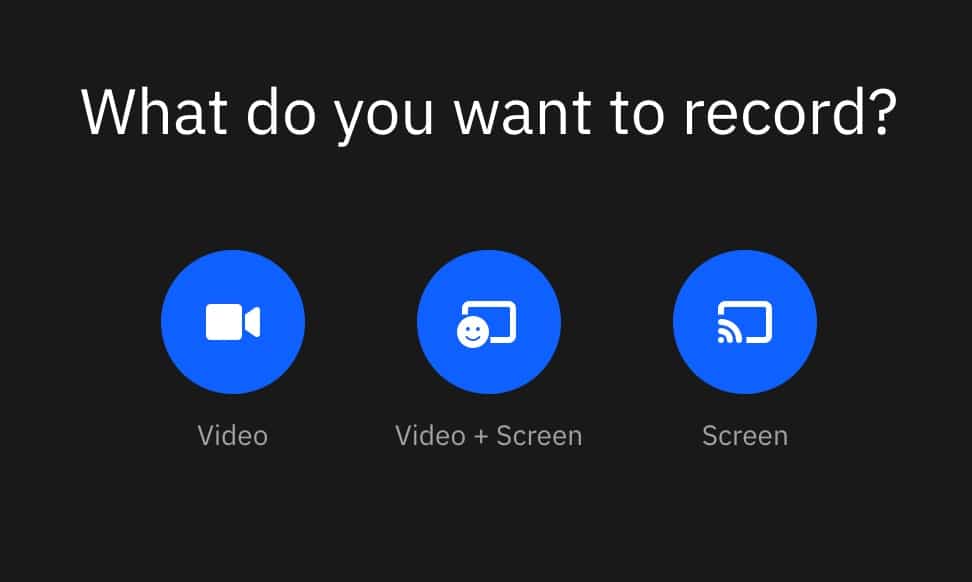
You can select Video + Screen, or just Screen depending on whether you want to record with or without your webcam. Then select the part of your screen you want to capture — the entire screen, window, or a browser tab.
You’ll now reach the video recording screen. And you can click the big red dot near the bottom to start recording.
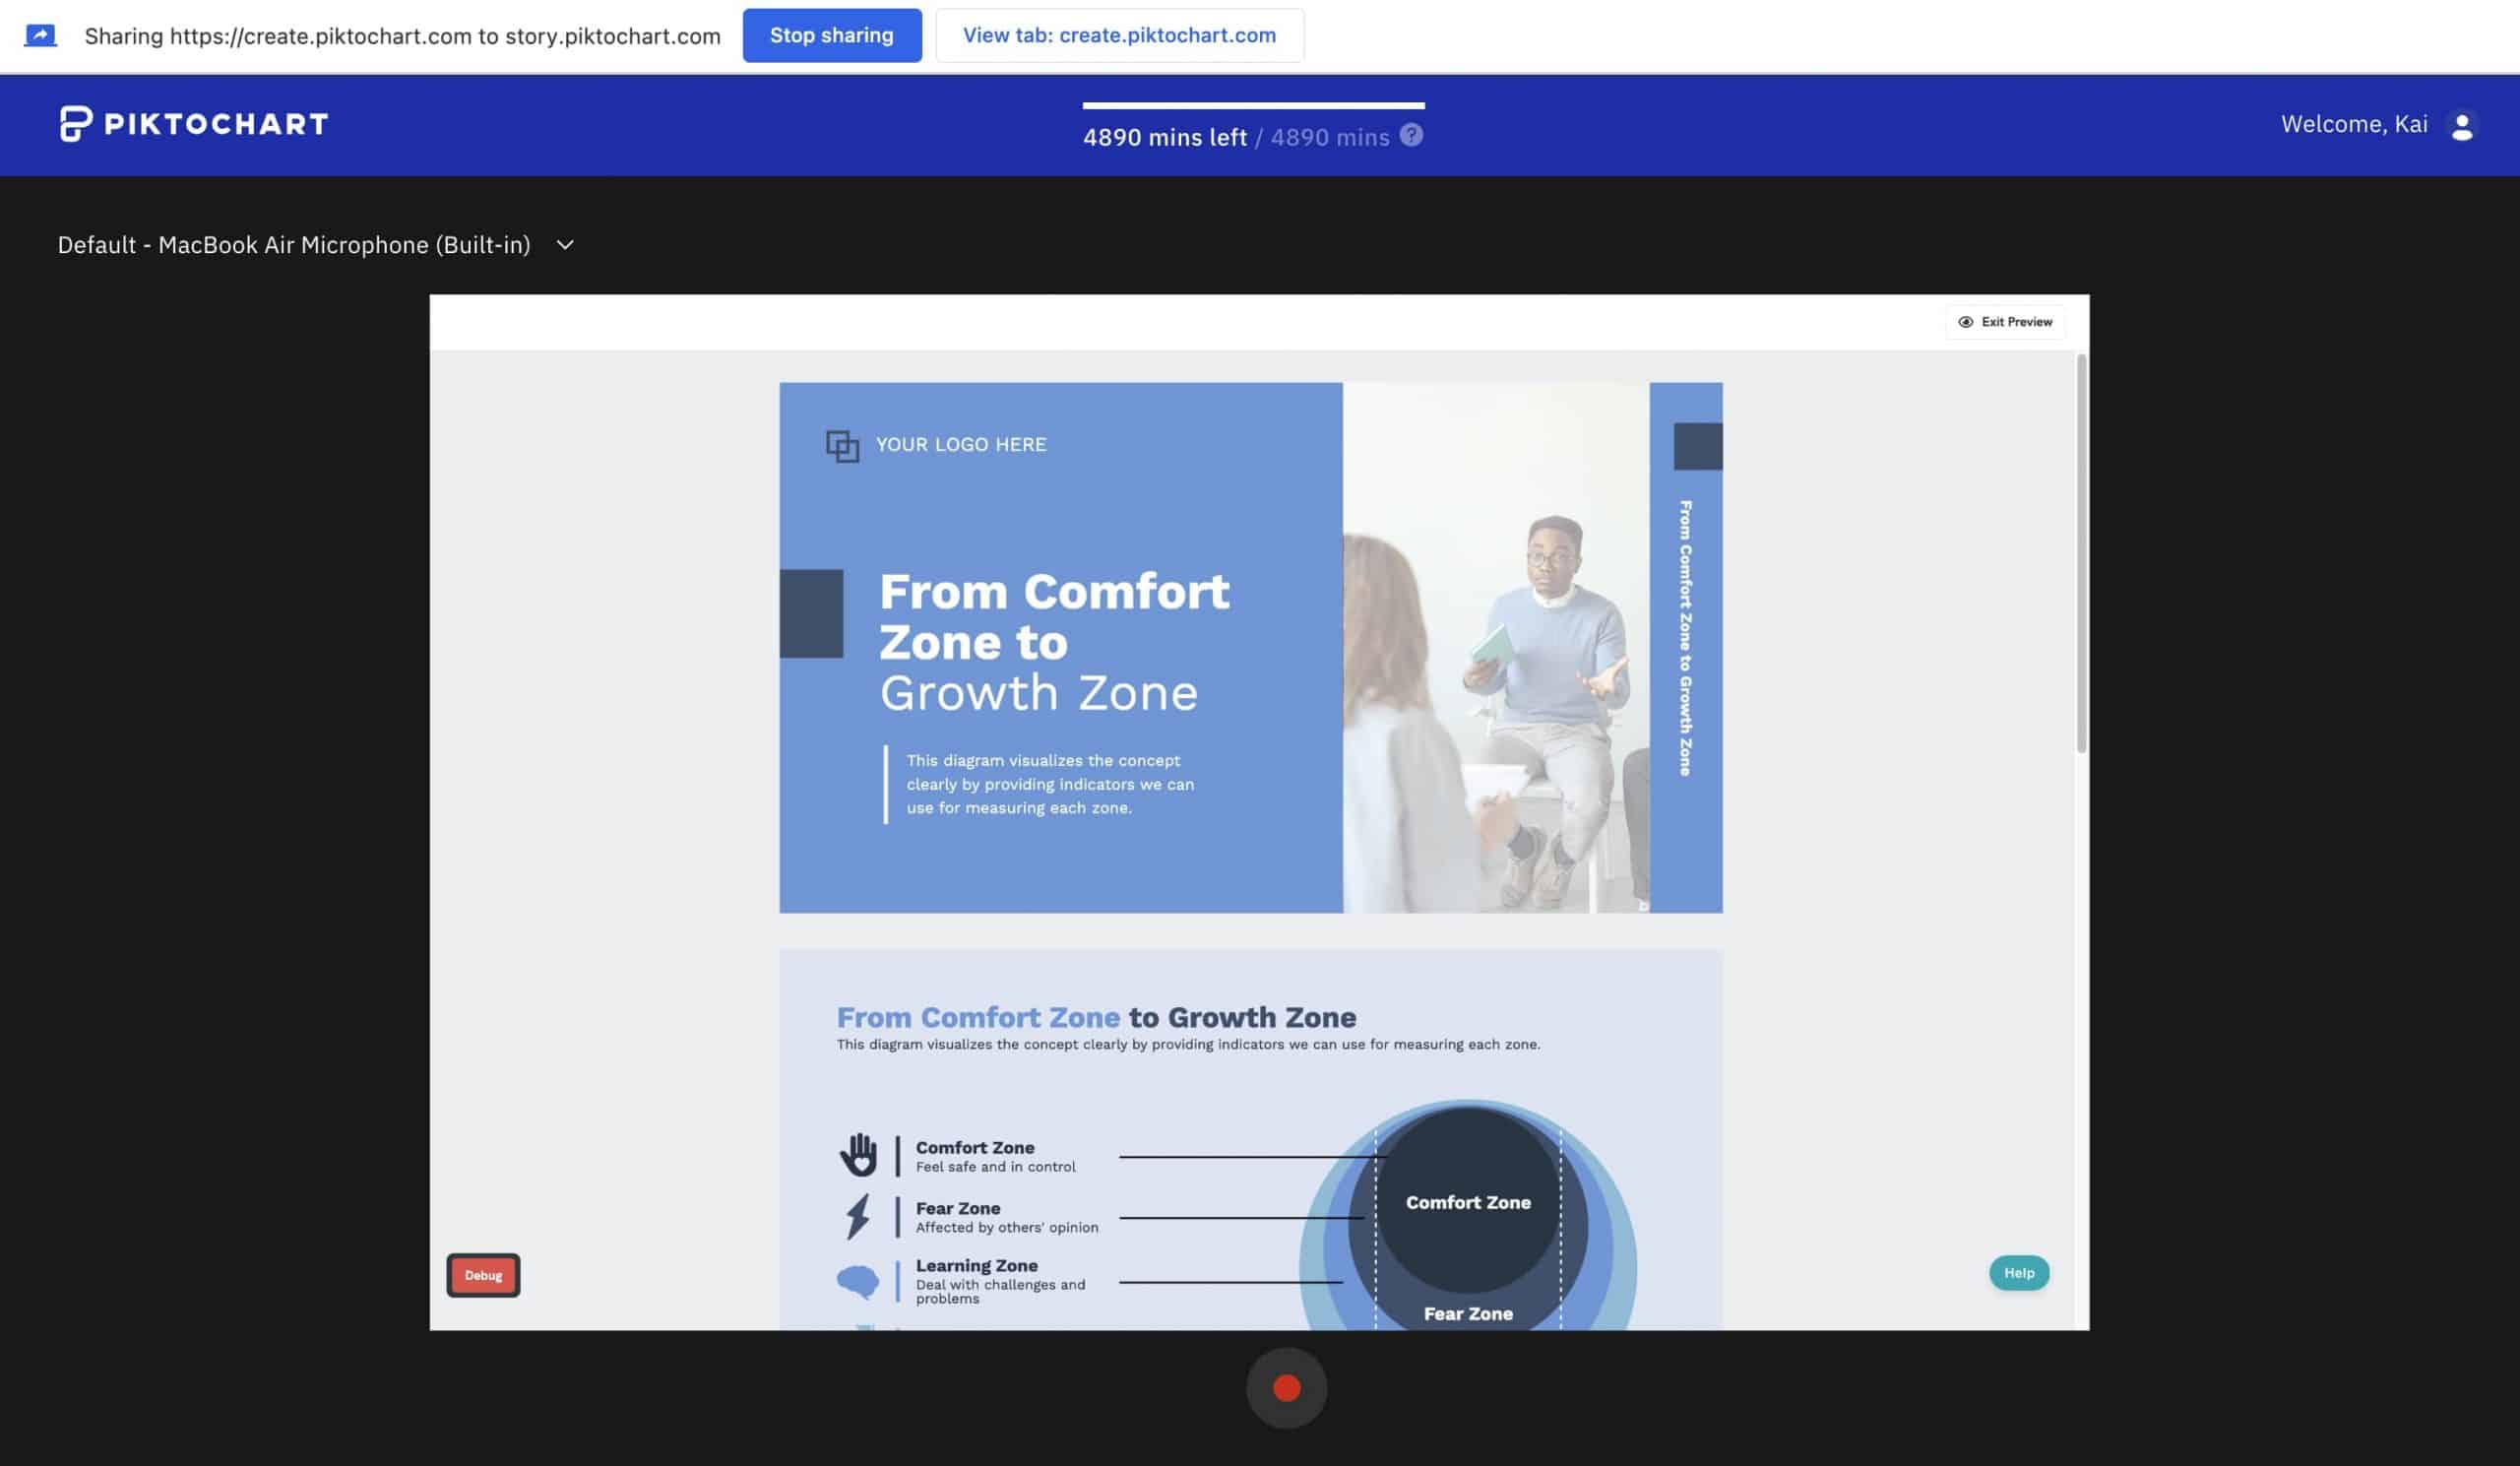
When the recording begins, explain the steps on your screen while speaking clearly and slowly. When you’re done, click the red button again to pause the recording.
You can then click Preview to see what you’ve recorded. If you like the recording, click Use Video. If not, simply discard the video and start recording again.
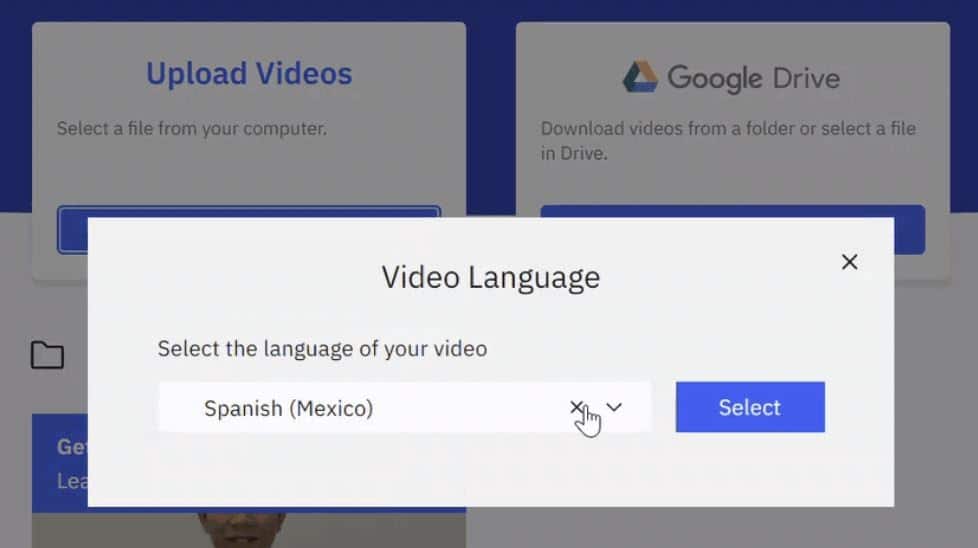
3. Select your video language
If you want to record your instructional video in a language other than English, we’ve got good news for you! Piktochart Video can generate subtitles in 60+ languages.
So on the next screen, select the language of your voiceover from the dropdown menu.
4. Edit your instructional video
You don’t need advanced video editing skills to use Piktochart Video. And the best part is that once you’ve recorded your video, Piktochart will generate subtitles automatically and show them on the left half of the screen. The right half shows you a preview of the changes you make.
Editing a video in Piktochart Video is as easy as editing a text document. Select the portion of the subtitles for the part that you want to modify or delete.
To edit the subtitles, just type in your replacement text. To remove the captions and the video content associated with them, click Remove.
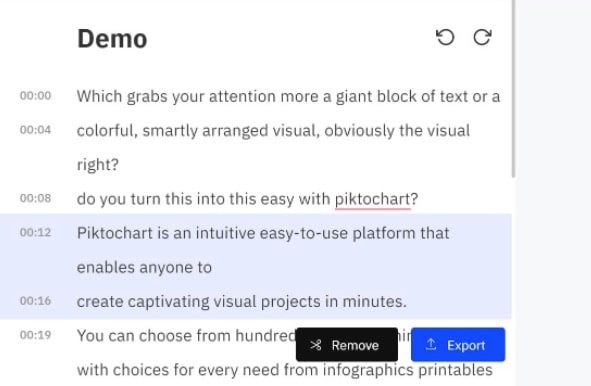
Repeat the same process with all the parts you want to edit.
5. Give final touches
Piktochart Video lets you do more than basic cutting and captioning.
On the left side of the screen and on top of the video, there are formatting options you can use to customize the font, its alignment, size, video background color, and more. You can also choose from pre-made templates!
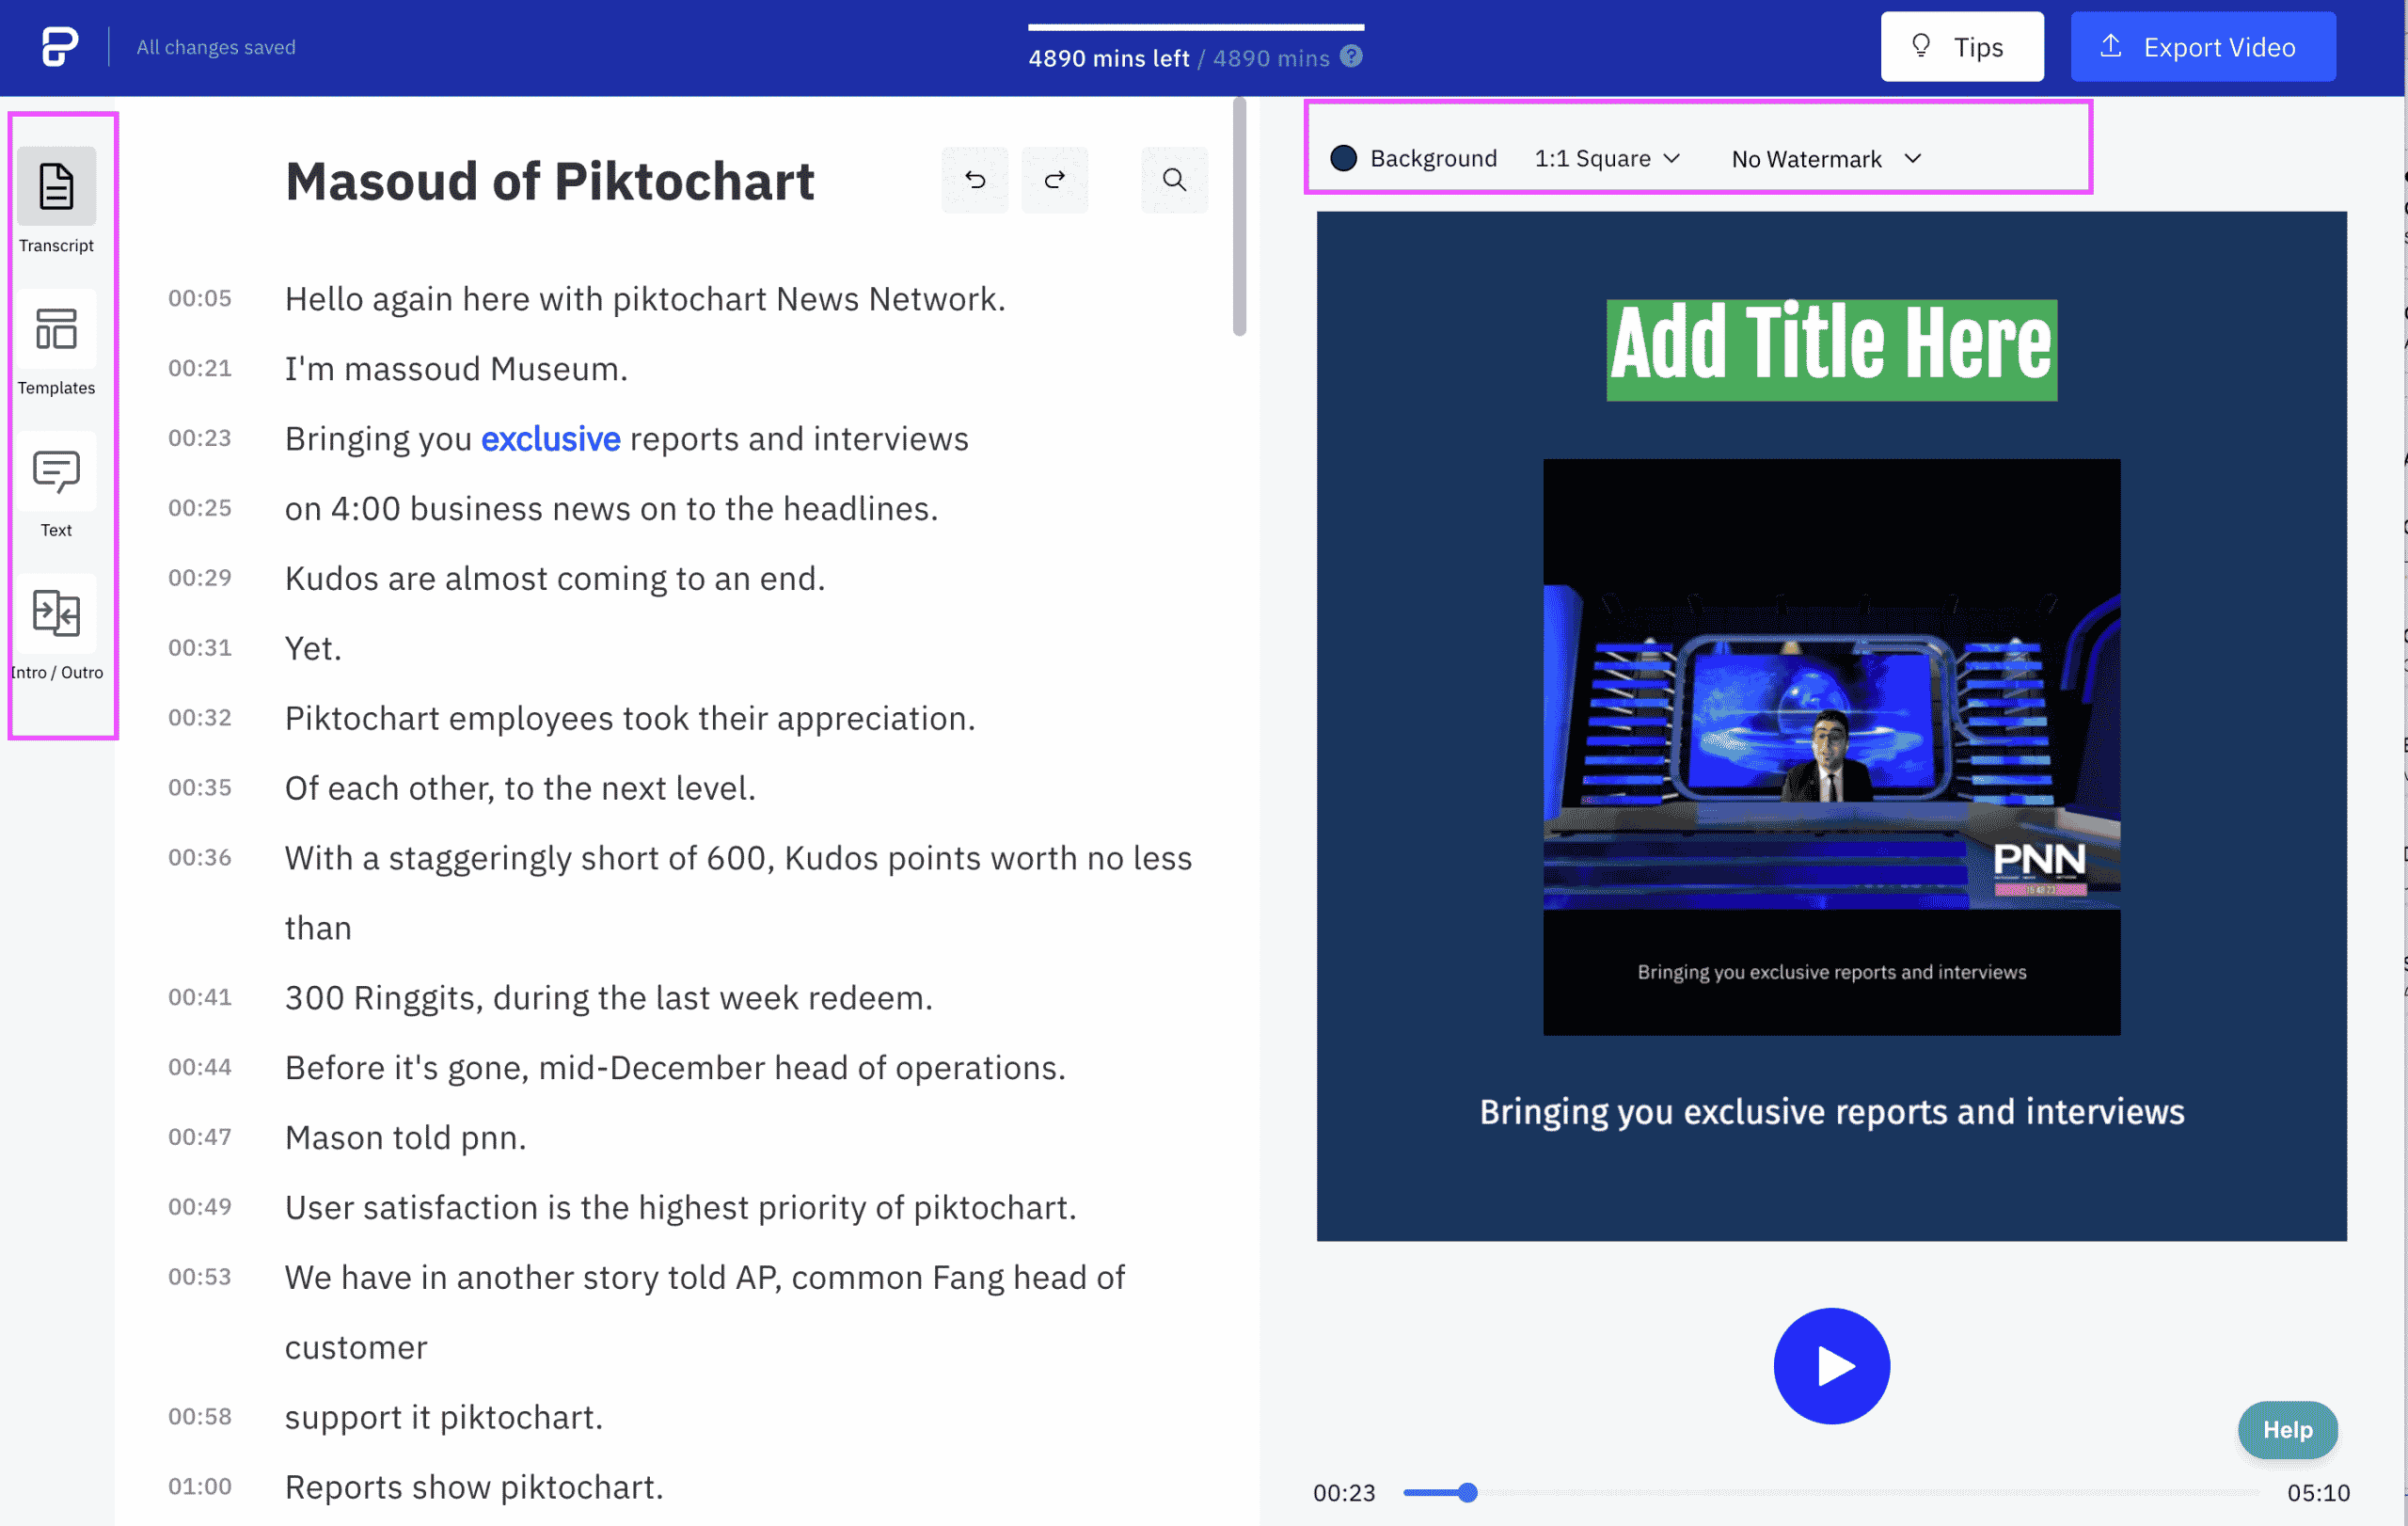
Not just that. You can also add an intro and logo associated with your brand to make your video look more professional.
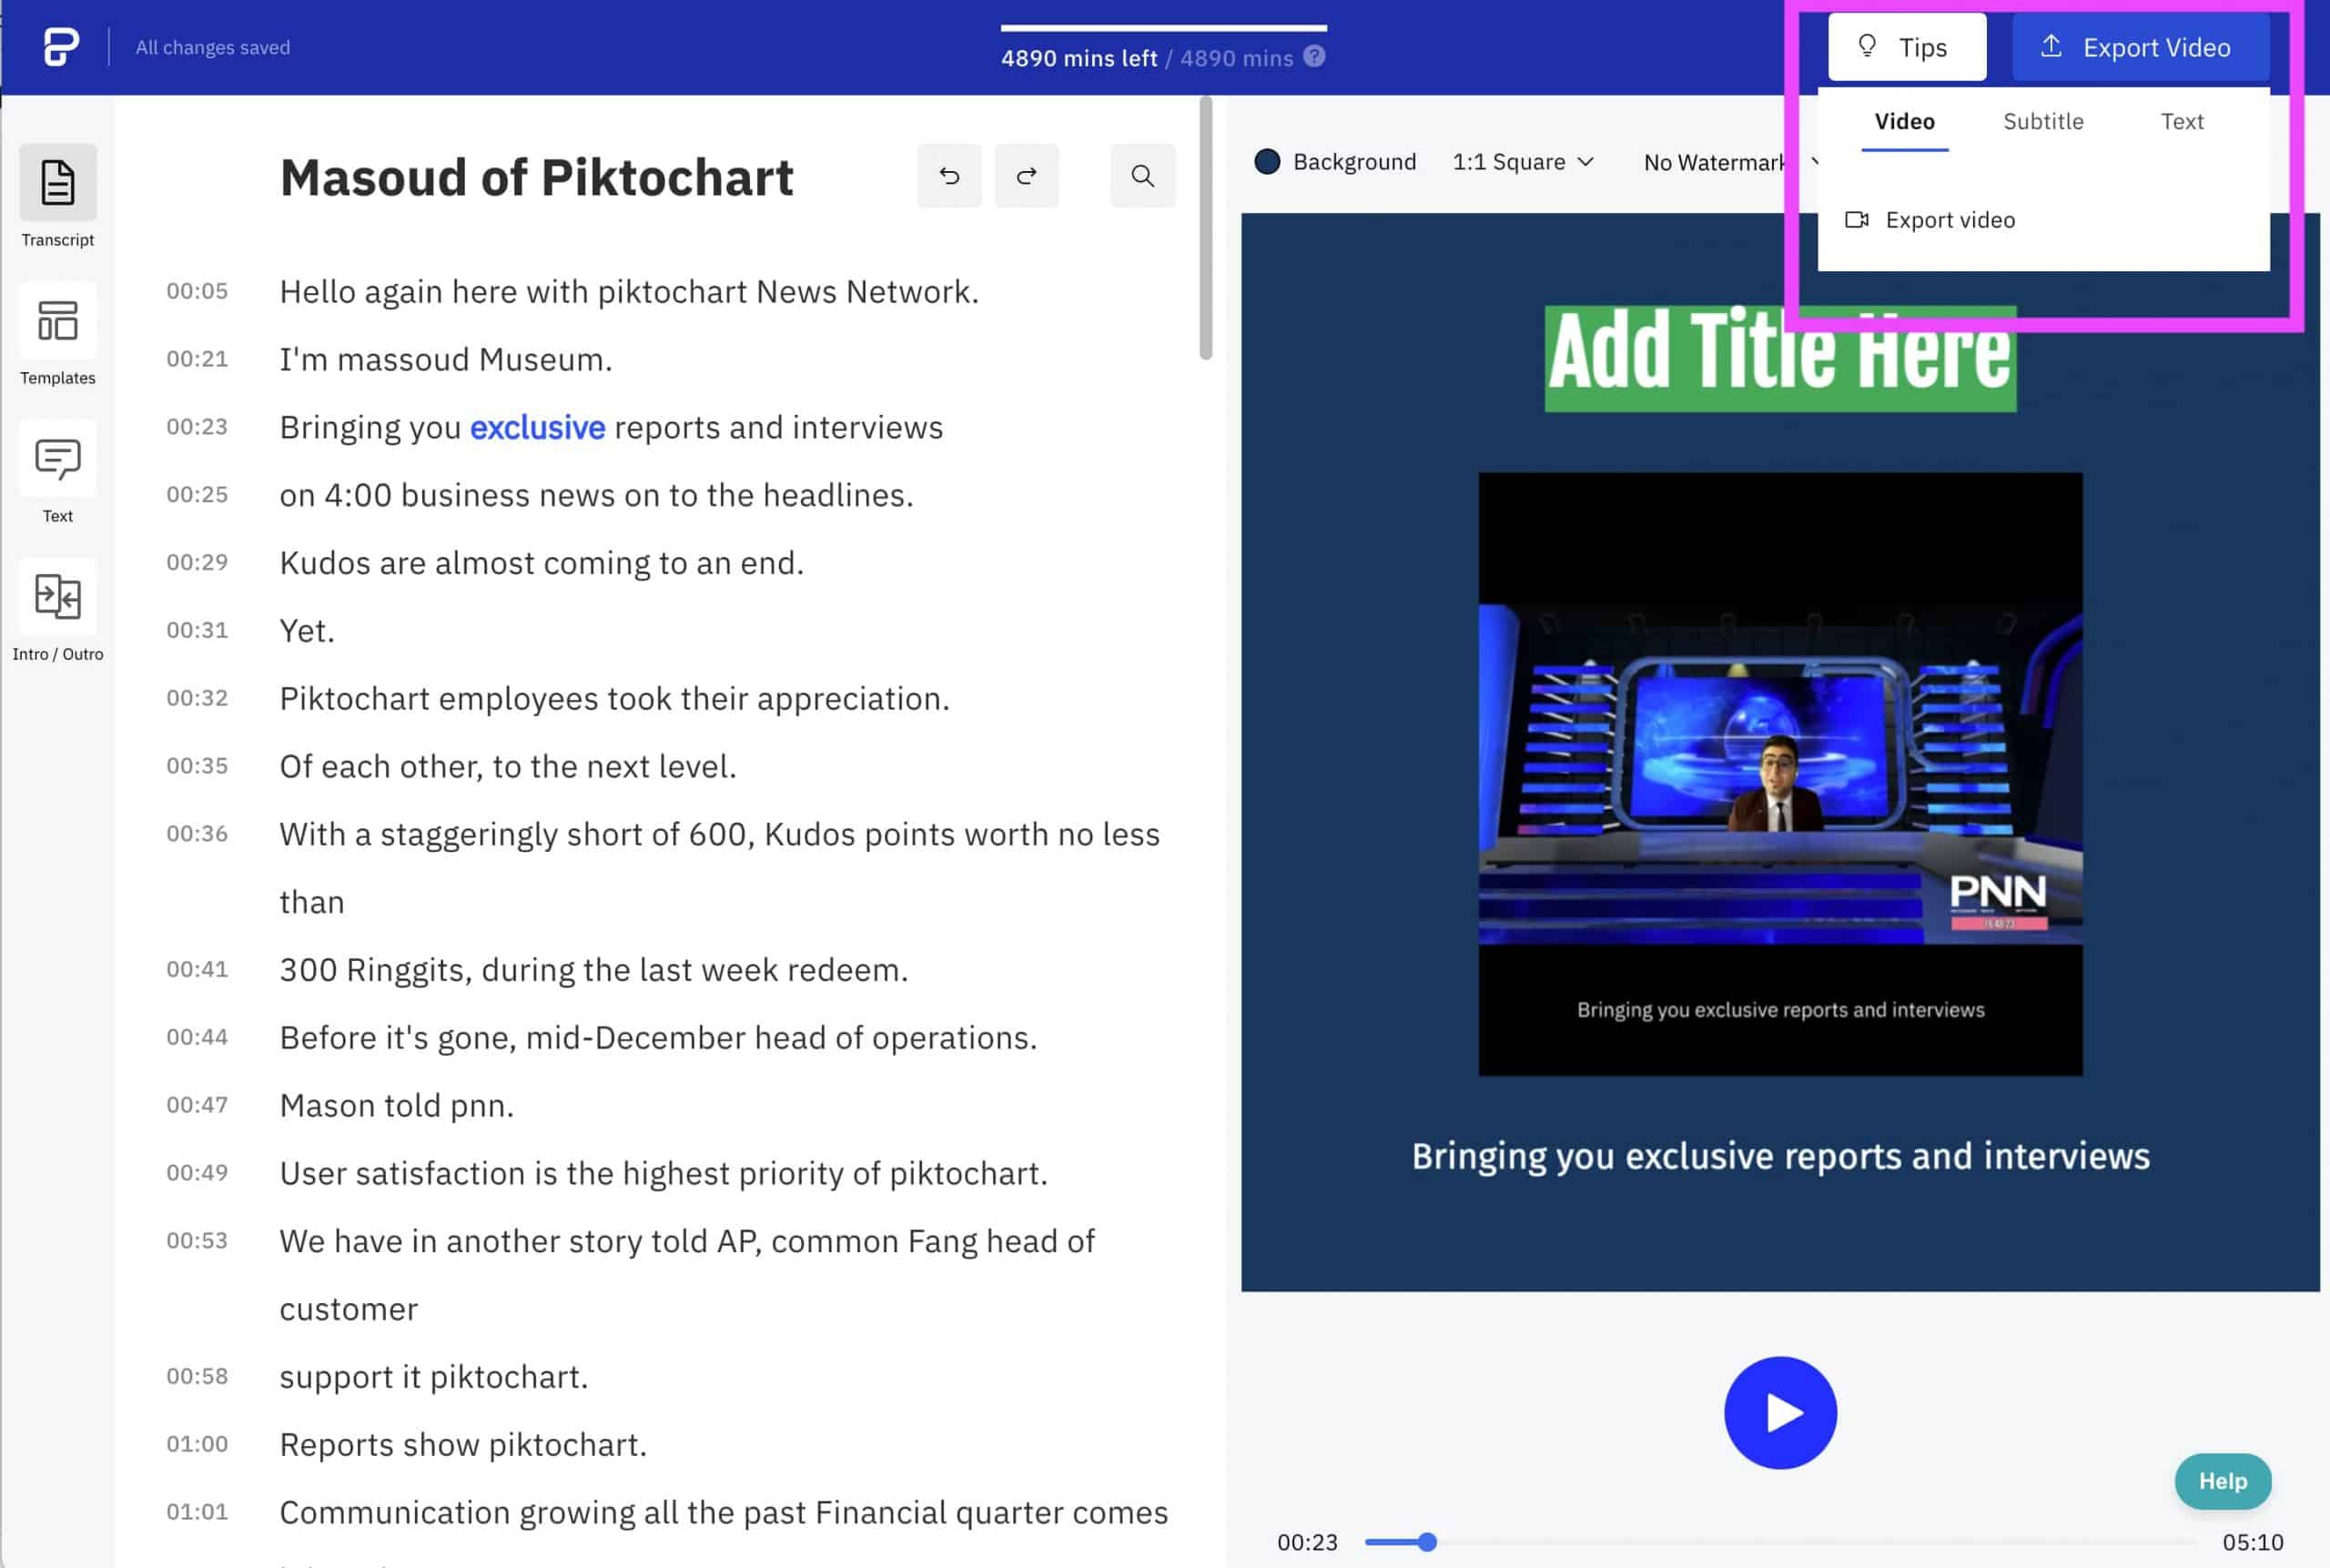
6. Export your Piktochart Video
Happy with the changes so far? You’re now ready to export your instructional video.
Just click Export Video in the top right corner.
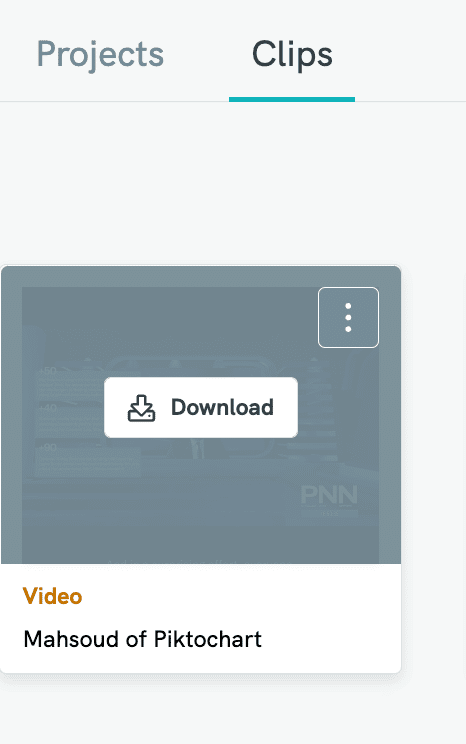
Then head over to the Clips panel of your dashboard, where your video will be ready for download. Take your mouse pointer to the video and click Download.
That’s it! You can now share this video with your audience via your blog, YouTube channel, social media, or any other way you prefer.
Start creating instructional videos with Piktochart Video
If you have never created an instructional video before, don’t expect to record perfect clips from the outset.
Great screen recording doesn’t happen overnight. You may often struggle and make mistakes. But so does everyone else.
Don’t get discouraged. Keep trying and learning from your experiences. Your efforts will pay off in the long run. Soon, you’ll see yourself creating engaging screencast videos without thinking.
Start planning your instructional video today. And when you’re ready to record, give Piktochart Video a try and share your expertise with the world.